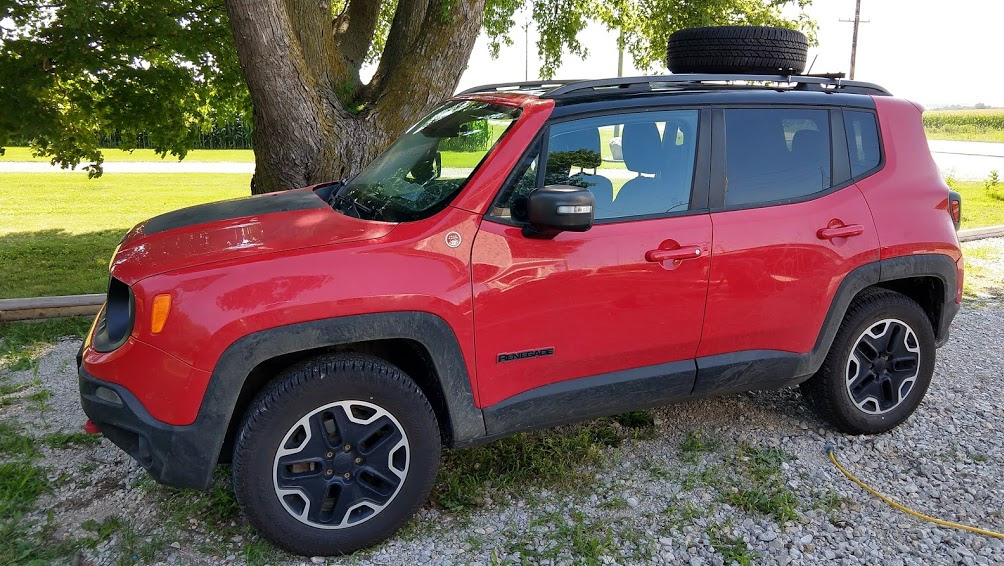
Jeeps should have a tailgate-mounted spare tire. Mine is no exception.
Some may argue that the newer Jeeps don’t count as “Real Jeeps” at all, but we don’t need to have that discussion. Unfortunately, the Senate didn’t approve the expenditures necessary to replace the pneumatic tailgate lifters with linear actuators or hydraulics. So, I guess directly mounting the tire to the tailgate is out.
There are a few off-the-shelf products that can put the tire about where I want it, but each of them have downsides. Some mount in the trailer hitch receiver, but block access to the tailgate and/or don’t allow actually using a trailer. Others aren’t (reasonably) compatible with anything other than a Wrangler. And the rest are out of range of the Executive Slush Fund.
Now, I suppose that a reasonable person would buy a fold-down bike carrier and replace the bike-mounting part with a tire-mounting part. We’ve had discussions about my reasonableness before, I won’t be doing that.
Additionally, mounting anything behind the car obstructs the backup camera. Trying to wire in an extension for that doesn’t seem like a good time to me. I’d hope it’s just USB or composite video, but FCA isn’t known for being reasonable either.
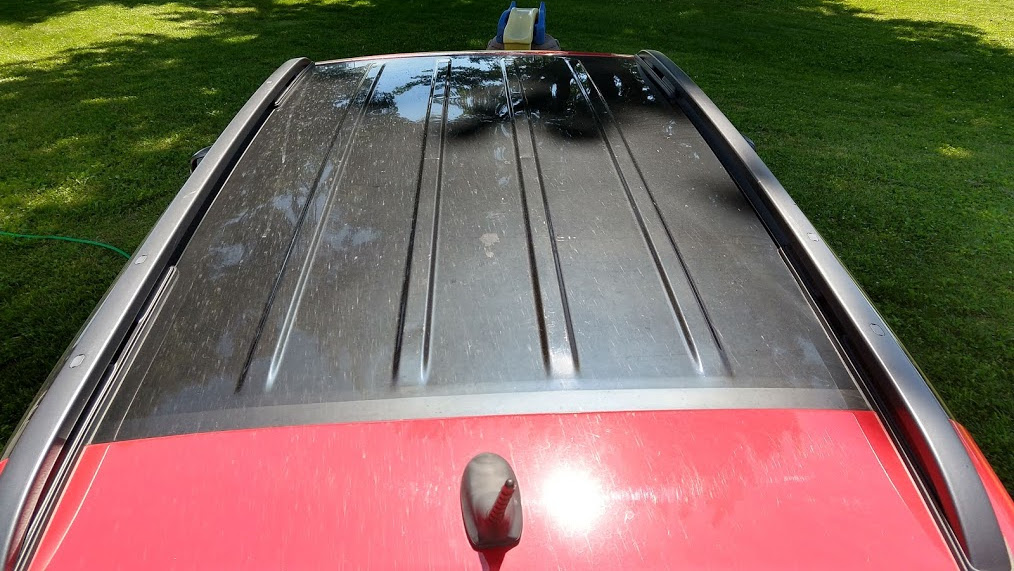
Fine. I’ll do something else; having the spare tire under the floor in the cargo area is very inconvenient if you have a full car. I guess I’ll stick it on the roof.
The lazy way to do this is to just hold it down with some ratchet straps and call it a day. I don’t think that’s particularly safe. Safety may not be first, but it’s at least second… maybe third… well, it’s the list. If I’m going to have 75lbs on my roof, I’m going to ensure it doesn’t become a projectile. I want the point of failure to be Jeep’s, not mine.
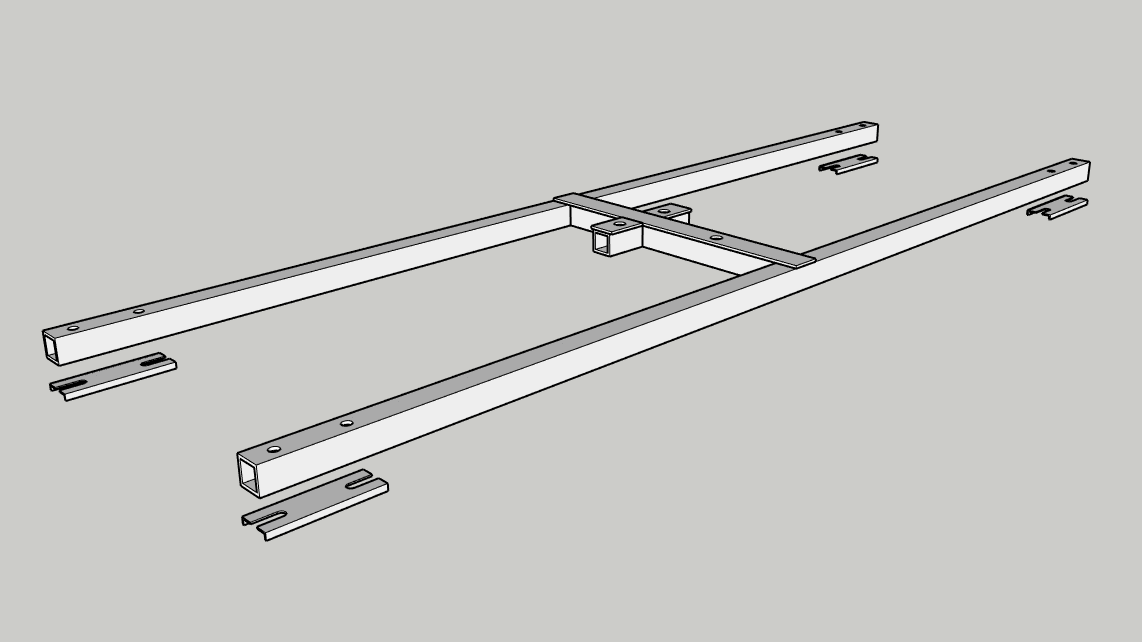
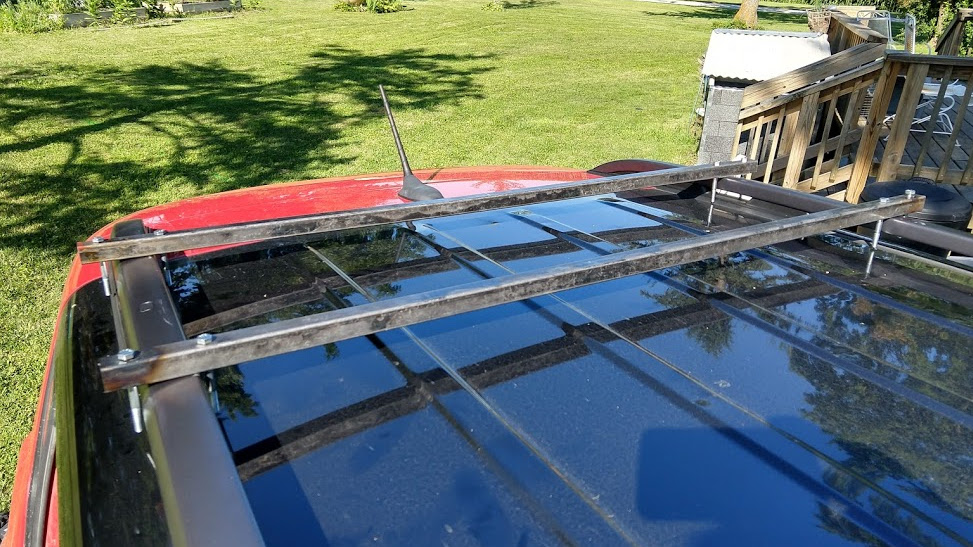
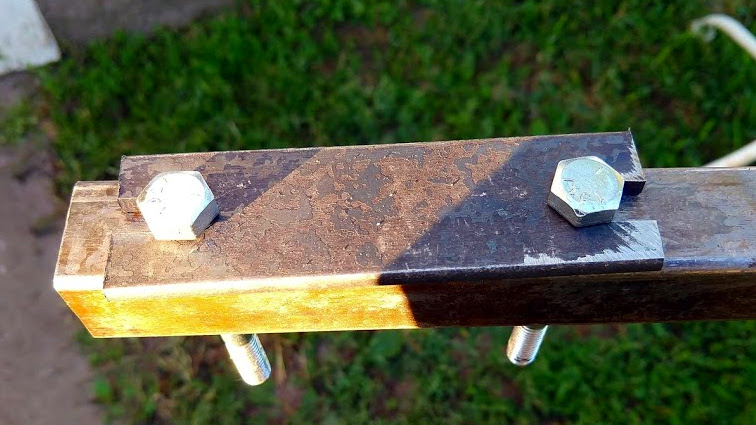
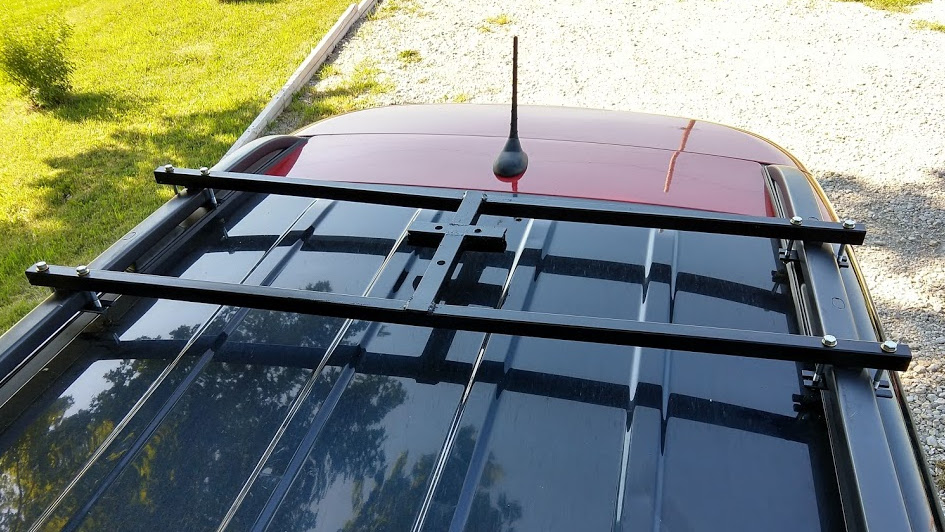
What I’ve got here is a frame that will get mounted to the existing dorsal rails, and the tire gets bolted to the center. The main construction is of 1" square tubing, with 1 1/4 x 1/8" welded to the top for extra strength, and for something to thread into.
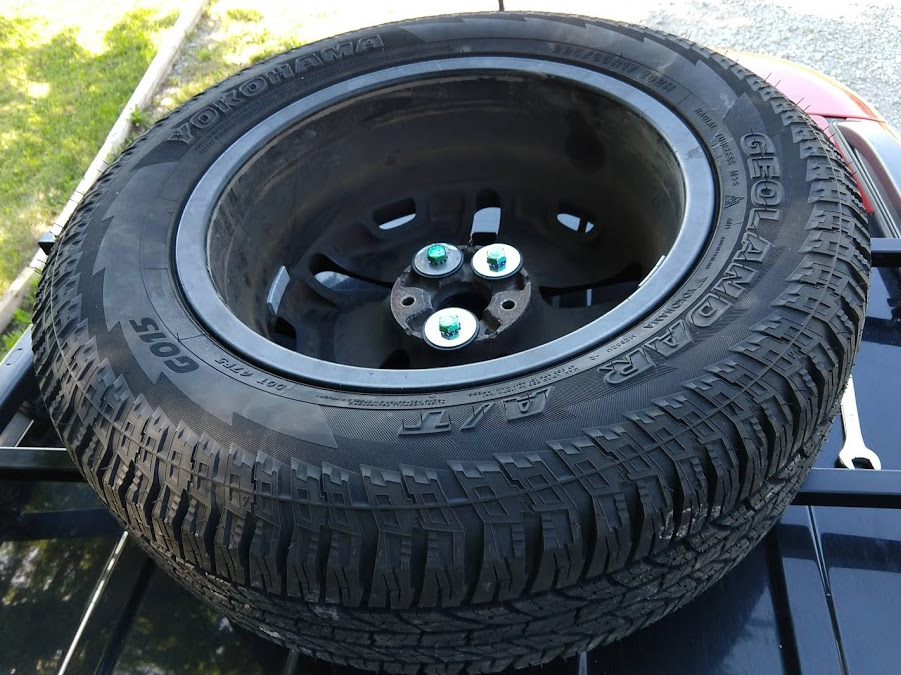
Some (brief) research indicated I have a 5x4.5 bolt pattern using 1/2-20 studs, on a Italian-derived car, I’m sure that’ll be fine1. Therefore I went with three 1/2" bolts holding it in place, hopefully this will mean I only need to carry the one wrench to change a tire. I considered using a single bolt through the center, similar to how it’s held into the existing storage space, but I’d prefer some redundancy.
I did have to decide between threading bolts into the frame, or having the bolts sticking up from the bottom. The former way conveniently allows removing the tire for use as a (small) general purpose roof rack. This is also why I didn’t weld nuts to the top and instead went with threading.
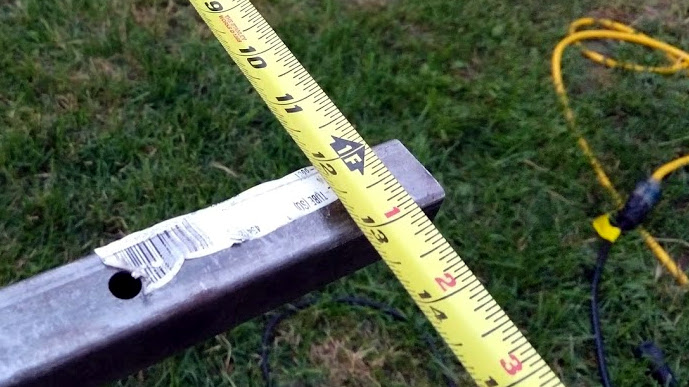
Alright, now to get the materials. Unfortunately, I don’t have the time (or willpower) right now to call up all the local fabricators and metal suppliers to see if any sell off-cuts2, so I’m at the whim of the Big Boxes. I can get 1" square tubing, though it’s a lighter gauge than I wanted (I got 16ga, I wanted 12ga). I wanted the bottom pieces to be C-channel, but I made do with some 1 1/4x1/8" bar. It also seems that (graded) 1/2-20 bolts are not easily come by, but 1/2-13 Grade 5 bolts are3.
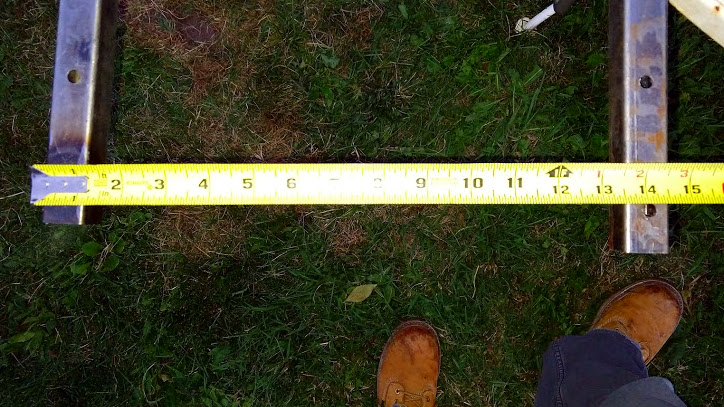
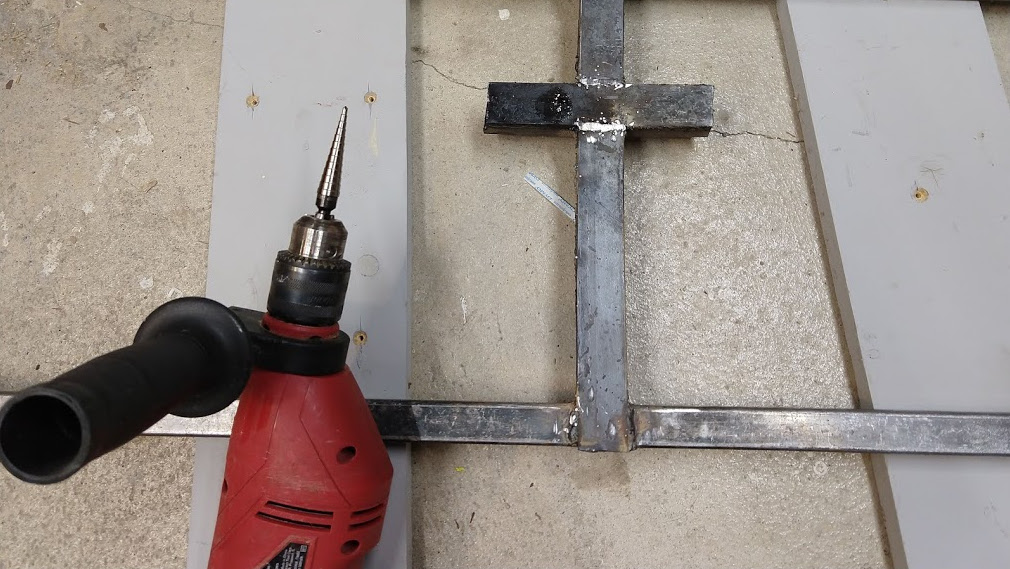
Well, I guess simple things first. I’ll measure out the holes on the crossbars. Since they are a known length my plan is to measure the inside and outside of the dorsal rails, and lay that out centered on the bar; then I’ll have to drill a bunch of holes.
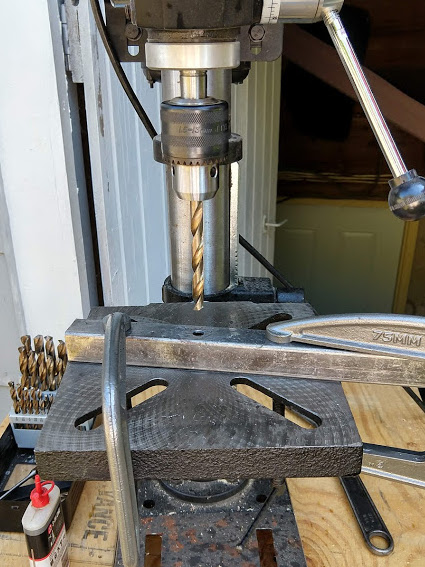
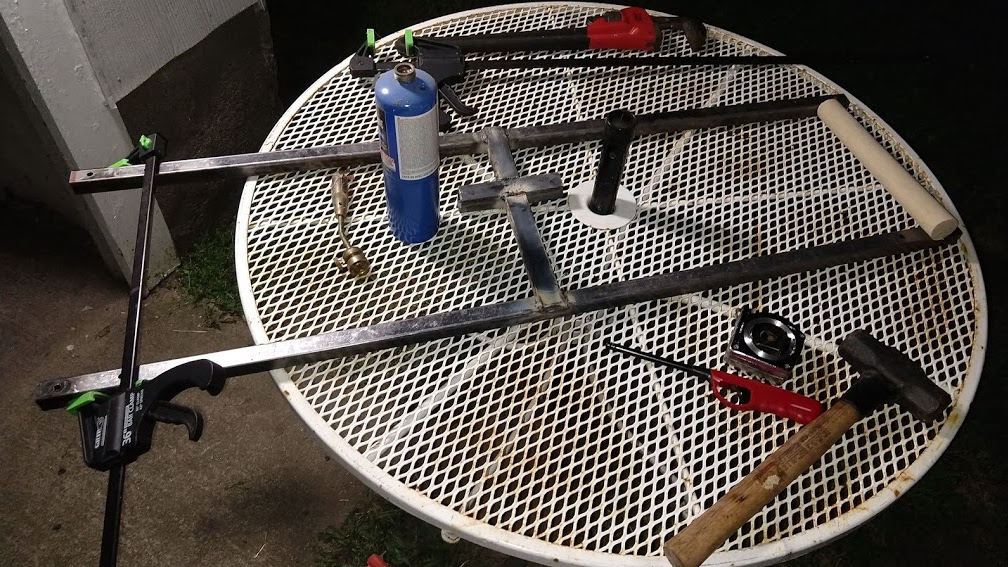
I really wish I had got a step drill bit as part of the supply run. To do this properly I have to change through four different drill bits, five if I want to be gentle on my drill press1. This takes quite a bit of time, and my supervisor is watching closely. Just to complicate this drill bit fanangling, my drill press only has 2 1/2" of travel, and these drill bits are mostly longer than three inches. This means I’m having to, every time, unclamp the setup and reposition everything. I knew I should have bought that crill press vice I saw earlier this month.
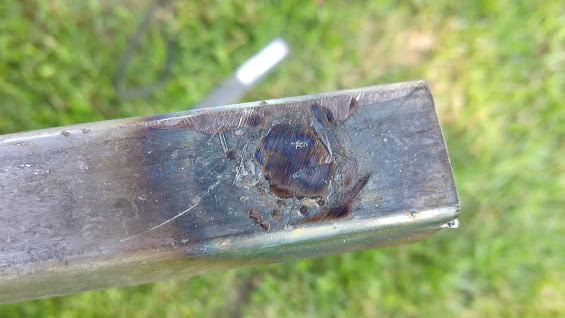
Bloody. How the bloody frak did that happen. Well, no picture of it, but the outside holes on the front crossbar are too narrow. I don’t have the time to do the right thing here and get a new tube. I’ve got a pretty firm deadline, and the supervisors have the hose out; I don’t want to get that again.
I hadn’t planned on it yet, but it’s time to get out the hot metal caulk gun and fill in a few holes.
Well that’ll work for now. I’m going to consider this project a Mk. I prototype with learning for future improvements. Some more drilling and drill bit changing later. . .
Now it fits.
Time for the center support. The length chosen here is fairly arbitrary; the front crossbar needs to be in front of the dorsal rails’ support, but far enough back that if could be usefully integrated into a roof carrying basket in the future. I went with 12 inches. I would prefer that the crossbars be farther apart so it doesn’t rub on the wheel and only contacts tire, but oh well.
Ah, good thing I’m consistent and ensure that every step has a problem. It looks like half of the arbor adapter for my angle grinder’s cutoff wheels has wandered off on its own. I’m going to have to resort to other cutting methods.
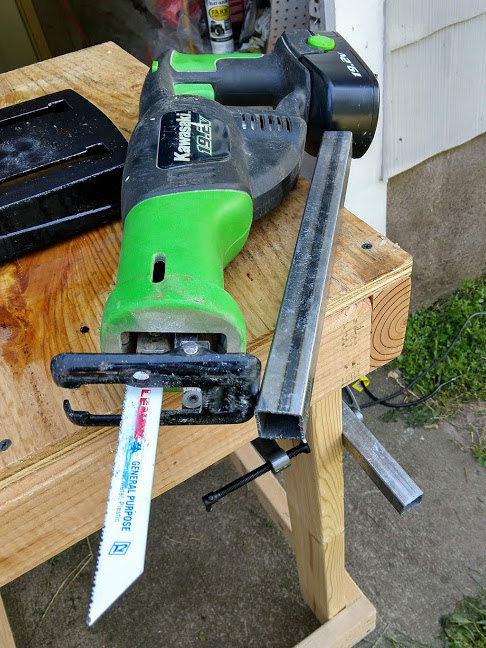
That made a messy cut, but it worked; these older (10-ish years) Kawasaki branded tools may be cheap garbage, but they’re cheap garbage with guts. If I’m going to be doing more metal work, I may have to come up with a different saw for nice square cuts. I’ll also have to cut pieces for the center cross. They’re also going to be a fairly arbitrary length, as long as they are long enough for the side of the lugs’ pentagon.
The tricky bit here is going to have the cross put in place so the tire is centered on the rack (I guess this isn’t technically required, but is mentally required). This requires some measuring and some geometry/trigonometry.
.
Wait, did I say the lug pattern was 5x4.5? Huh. Nuts. So, after some measuring, it looks like it’s more like 5x4" ish. Further internet investigation (intervestigation? Internetigation?) says 5x110mm, but my measurments say 105mm (as far as I understand how it’s supposed to be measured). I’ll just go with what I measure, 105mm diagonally, and 54mm sides.
Alright, so the cross is a bit long (I may have measured for the widest part of the pentagon instead of a single side). I probably should have checked that before attempting to refresh my welding skills.
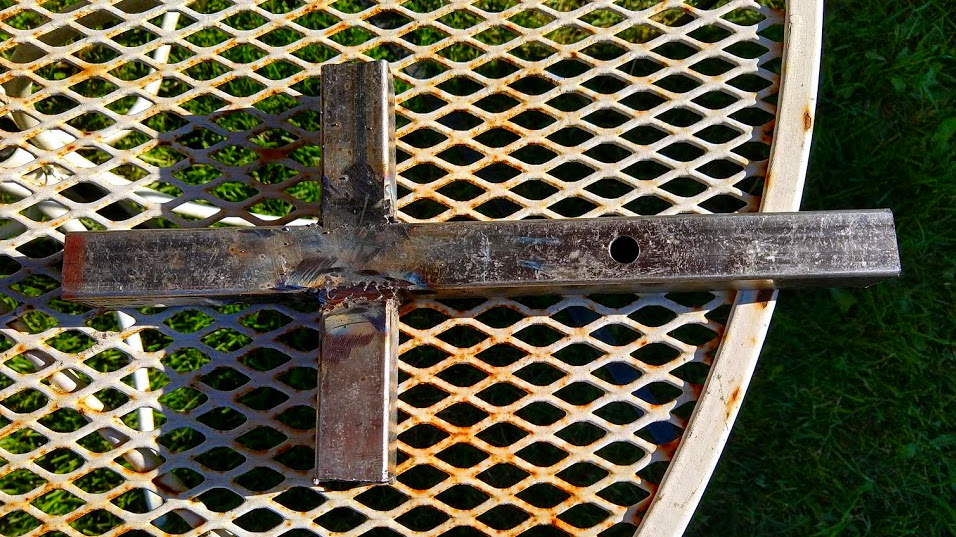
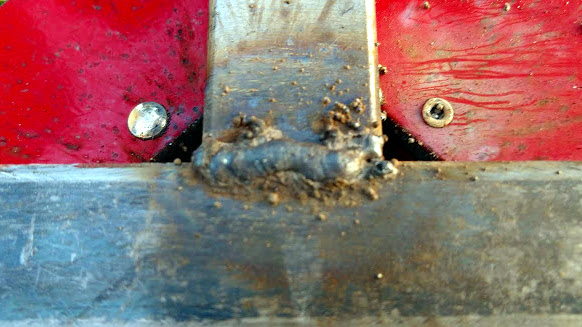
Er, I’m going to blame the welder for the time being. I’m pretty sure I used to be better than this. I mean this is the cheapest flux core welder money could buy4, the high current setting just blasts away the tubing, but the low current setting barely puddles. And both settings throw splatter like a toddler trying to whistle. As a Wise Canadian Poet once said, “grinder and paint makes me the welder I ain’t.” I’m not going show you this one up close.
The next steps are to put the plating on top of the cross, and to drill and tap the holes for tire mounting.
I’ll put the single piece crosswise for strength and then add the front and back pieces (leaving them overlapping the crossbars).
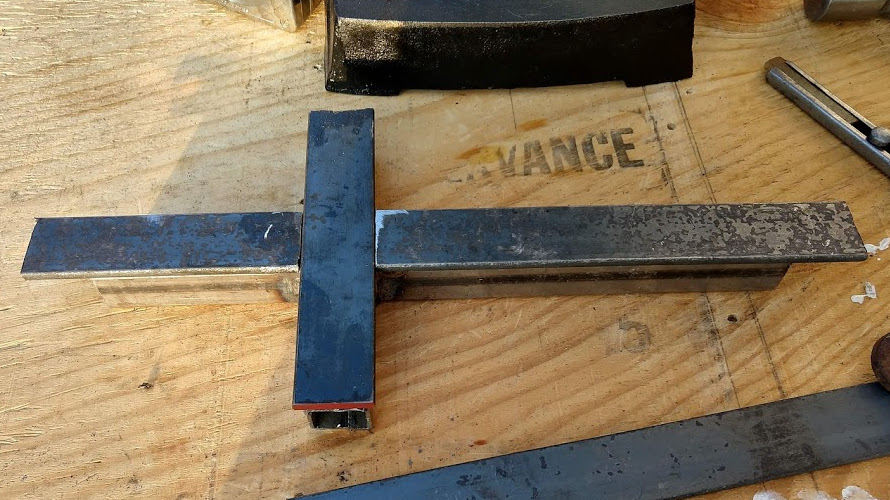
Yeah, like that. Let’s see if I can get this welding thing remembered.
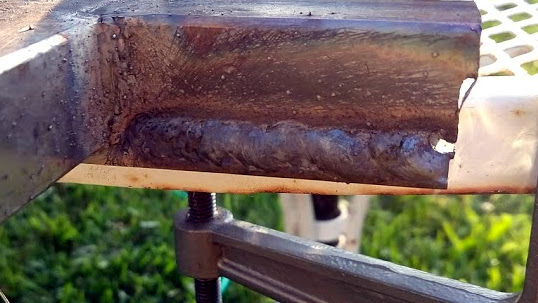
Much better, that. The high current does much better with the 1/8"; it’ll even produce welds I’m not too ashamed to show. The butt (more or less) welds on the top aren’t looking great, but I’m willing to blame that on me.
Now I just have to weld it all together. I’ll just hold hold it in place with these convenient magnets, tack weld it, then adjust to square and finish welding all the seems up.
That’ll do. Now I’ll just do up the other side, and check it over.
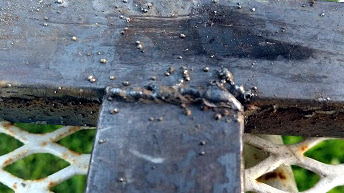
Uh…
I may have forgotten a step. You know how I said, “tack weld it, then adjust to square”? I may have gotten ahead of myself and just welded it. This was not a good idea.
Definitely a prototype.
I suppose I could heat it up some and try to force it straight.
Well this might work with more time and/or bigger heat, but it’s past the supervisors’ bed time and I only have one more evening to work on this.
Time to move on.
I’ll cut all the the bottom-plate-things.
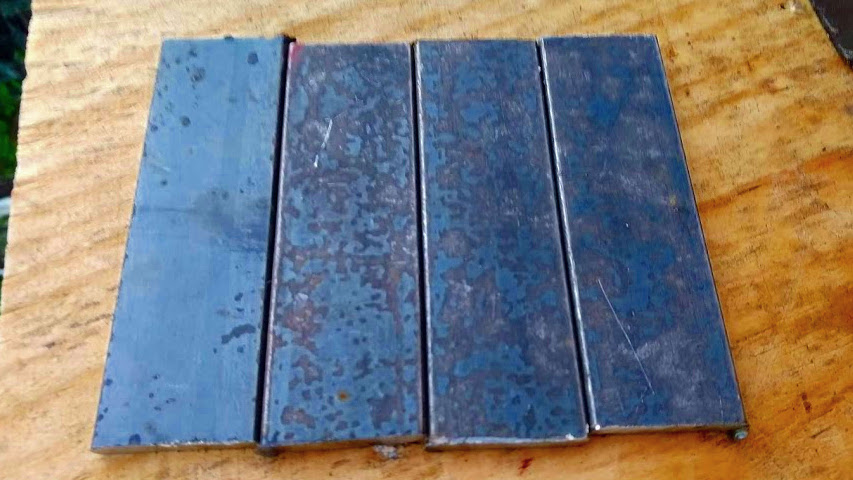
Much nicer cuts now that I have an arbor adapter and can use the cutoff wheel. Oh, yeah, I snuck over to the Green Big Box before work and picked up a few things, including a step bit.
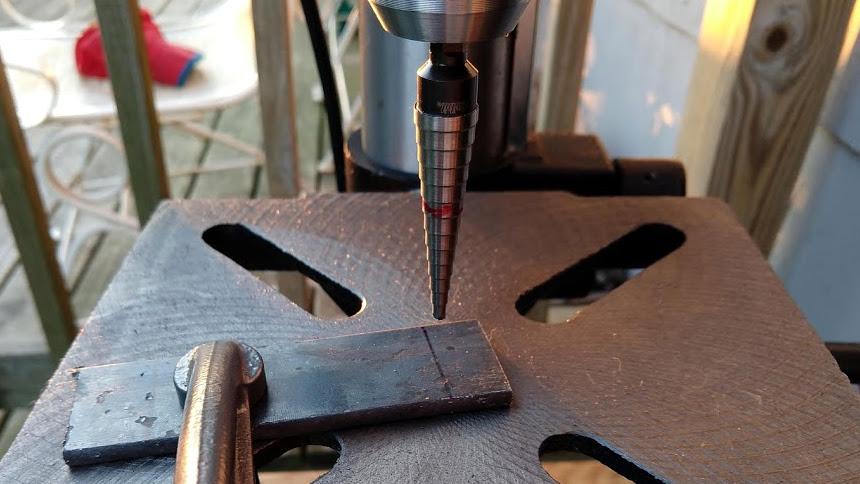
Weeeeee! Much better. This is a #1 step bit, which starts off pretty small, but I still need to start it off with a 5/64" (more or less).
With some additional application of the angle grinder the holes become slots.
Yeah, yeah, they could be slightly prettier, but, prototype, remember? I’ll just break off the sharp corners and call it a day.
Aw, bloody. Remember how I said I was going to drill and tap the tire mounts before welding the cross in place? Well, I forgot. I blame the supervisors’ hose, it was quite distracting keeping it off the welder.
Clamping it into the drill press may get tricky.
Turns out, that won’t matter, my drill press now trips the GFCI outlet it’s plugged into. I’ll have to sort that later, for now, time to bring out The Wrist Breaker5.
Alright, I had to bust out the 27/64" bit for the final pass, but it worked, and only one of the holes was accidentally drilled to 29/64".
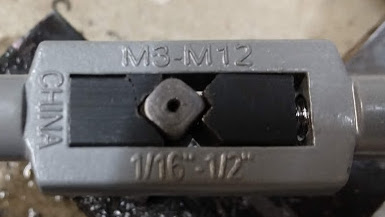
Tapping though. I should have picked up a (nice) new 1/2-13 tap for this job. My clearance chinesium6 tap set handled the first two holes alright (destroyed the tap handle though) but it just wouldn’t bite on the final hole. Closer inspection revealed that the bottom couple teeth are broken off and/or rounded over. As a testiment to this tap’s cheapness, I was able to remove those teeth with a file7. Then I was able to make some progress, and a mess of that hole. It holds the bolt, but it’s not quality.
Hrm.
I knew I should have given this step more thought. Threads stay in place by being tightened down, that will be difficult here. I had originally purchased 12", but those were way too long, these are 10". These are also too long, unless maybe I make a plate to go over the top? I don’t have any steel lying around for that, so maybe wood? I have plenty of plywood, I could make an 8" circle and put three holes in it, but that seems like a cheap way out given the rest is metal.
Maybe a shorter bolt? Well, the next available is 8", and that’s too short. I’d have to shorten the 10" and cut more thread. I personally don’t trust my die that much (it’s from the same set as the tap). Additionally, if I go shorter the corners of the head bite into the wheel; the studs have tapered necks to prevent this. I could add a big tapered washer/spacer thing, and I have few big rubber stoppers for this purpose. With my drill press out of commission, I think this would be easier said than done.
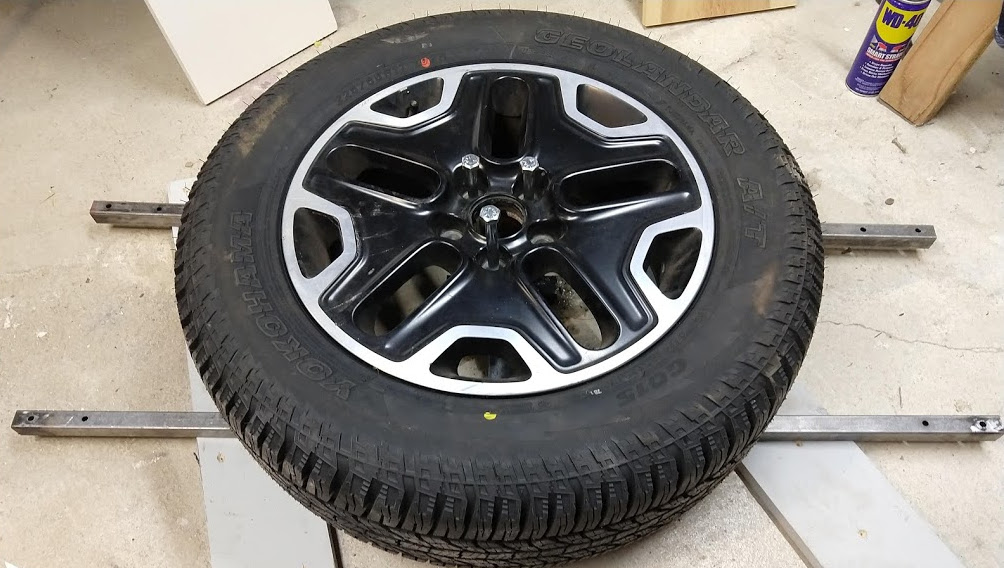
Alright, I didn’t want to do this, but I guess I’ll have to flip the tire over. This runs the risk of scratching up the wheel on the crossbars, but it gives me a nice flat area to tighten the bolts to.
In the meantime I’ll bust out the sander and mineral spirits, clean it, paint it, and move on.
While the paint was drying I grabbed some more bolts. This is why you plan, so you don’t have to buy four different lengths of the same bolts.
Let’s slap this up there and see what happens. I’ve got some stick-on furniture pads to keep the metal-paint-paint-metal contact to a minimum.
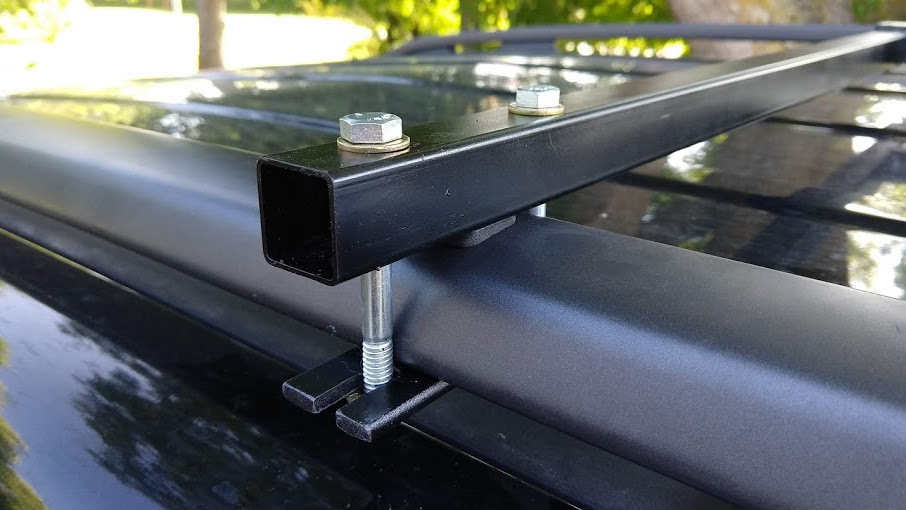
Bolted in place (with some Loctite for good measure) it looks pretty good, as long as you don’t pay attention to the widths on both sides. Thankfully most people are not looking at it form above.
Now to bolt the tire in place, I’ve got some big washers so as to not mess up the wheel and some lock washers to help keep things from wiggling loose (I suspect they probably won’t really do much, and certainly won’t be more effective than the amount of Loctite I’m going to use).
Uh, so remember how those are 12mm bolts? Well, 12mm is less than 1/2", the previous bolts most have been a bit small since they fit anyway. These new ones are actually 1/2" the whole shaft; I’ll have to turn them down some, this would be easier with a lathe. It would be easier with my drill press. Well, 1/2" bolts fit in a 1/2" drill and I’ve got a file. Yes it worked, no there’s no picture.
Alright, this looks good to me, and I really need to be done. I’m supposed to be leaving in an hour and haven’t packed yet… this took longer than anticipated and The Senate is about ready to impeach me.
I am going to ratchet strap the tire to the frame, just in case things go wrong.
Postmortem
- I don’t fully trust the 1/2" threads, I’ll drill them through and weld on some nuts. Or—if I can find one—use a coupling nut stuck through it.
- I’ll probably flip it over and drill holes for the bolts to go through and thread on the bottom. This will give me a completely flat surface for the tire, currently the corners of the top plate rub on the wheel.
- The rush paint job wasn’t very good; probably should try to go from mineral spirits to final coat in two hours.
- Grade 5 is overkill, and this is likely going to turning into a rusted mess. Stainless 18-8 has similar strengths to Grade 5 anyway.
- After 4000 miles things see to have stayed in place and tight
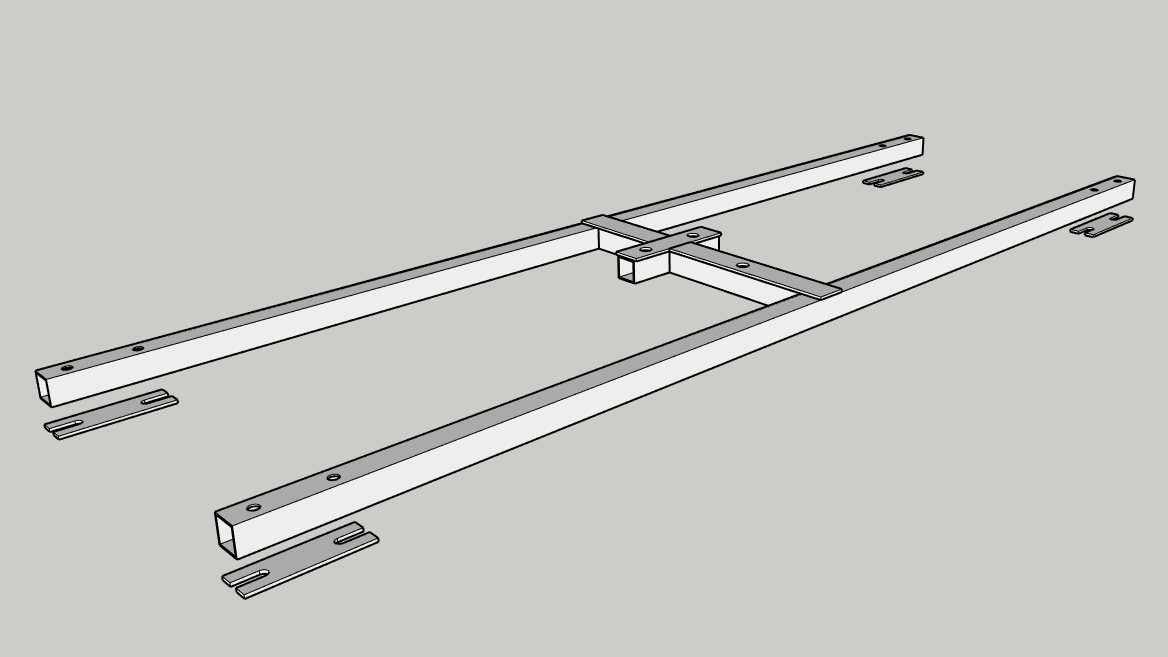
This is a drawing with the actual parts used:
Annoyingly, this is a class of businesses that need better websites. ↩︎
I really would prefer fine threads. With 13 threads per inch there’ll only be one and a bit turns in the material; with 20 tpi, there’d be 2ish turns. That extra turn gives me longer before failure if things start to vibrate loose. There’s also more holding ability in a tight fitting fine thread. The same way that two phone books with interleaved pages can hold up a person, but just trying to hold the books together cover-to-cover really tight won’t. Ok, actually the fine threads’ lower inclination angle is more relevant here. I think that’s enough tangents for now. ↩︎
I needed to fix my lawnmower– likely a recurring trend on here–and this welder was cheaper than a new mower deck. Harbor Freight Special, this one. ↩︎
It hasn’t actually broken my wrist yet, but it keeps threatening to. It has messed up a few fingernails, and battered up my shoulder and wrist pretty well. ↩︎
“chinesium.” Is this a proper nown? “Chinesium?” ↩︎
Hey, maybe it’s a magic carbide file, I don’t know, I just grabbed it at an antique shop for a few bucks. Most likely though, it’s a too-soft tap, I should have needed a grinder to fix it. Though I also probably should have annealed the area around the holes since it’s so close to the welds. But, then I have had to harden and temper it afterwards too, and that’s a rabbit hole I’m not entering. ↩︎